Casio DBC-611G Battery Change (Module 3228).
Casio DBC-611G Battery Change
(Module 3228).
Hello fellow Casio watch enthusiasts from around the world. I hope you are all well.
As the title suggests, I will be replacing the battery in my DBC-611G. I have owned the watch a little over 2 years, and I am more than happy with it.
A couple of weeks ago, I changed the batteries in some of my other watches and noticed that this watches display was starting to dim. I panicked and immediately ordered a battery (£5) and received it quite quickly. I say panic (and I mean panic) as a leaking battery would have destroyed my watch. No if's, not but's, it will destroy a watch. I see way too many examples of vintage watches being destroyed by a leaking batteries. I have seen grown men cry because of their losses and I include myself. Believe me, it is much cheaper to take it to a jeweller and have the battery changed rather than crying over a dead watch that is now scrap.
As I have a small collection of watches, it has been beneficial for me to invest in some correct/decent tools and learned how to change the batteries for myself in each of my watches. Over the years I have learned that, changing a watch battery is a very delicate operation. It should only be done by a qualified or specialized person, to ensure the watch is not damaged beyond repair during the process. Therefore, I take no responsibility for any damages you may incur either financially or physically. Please do not attempt this operation.
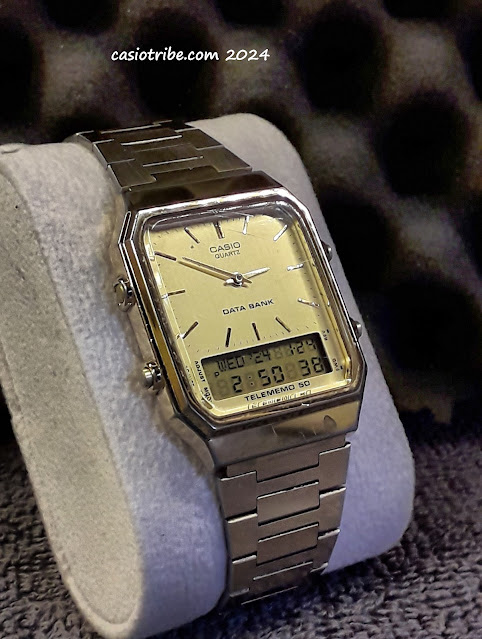
As you can see in the picture above, the display of my DBC has faded and will require a new battery. I am hoping the old battery has not leaked yet, as this would be a nightmare situation as I could not afford to replace this watch very quickly.
As you can see, the battery required is a CR1616 type 3 volt button cell. I have bought a good quality Duracell version, but there are other manufactures out there that make the same battery. I chose a Duracell as they have an excellent reputation in the watch community. Yes, they may be a little more expensive but if they do not leak, then it is more than worth the little extra money.
With the battery in hand, I got out my tools and started on the battery exchange.
Rather than remove the rear case first, I will remove the strap as this will make changing the battery a lot easier.
With the strap removed (and a little of the gold coating), I could now remove the back of the watch ensuring no foreign objects can get inside.
After removing the 4 screws that hold the back onto the watch, I carefully removed the rear cover ensuring I do not move the gasket/seal from it's position.
When the rear of the case was removed, there was a sticker/insulator covering the battery compartment that I had to gently remove before I could remove the old battery.
Once the sticker/insulator had been removed, I carefully used a sewing needle to pop off the clip that retains the battery. This operation could have ruined the watch if I was not careful enough.
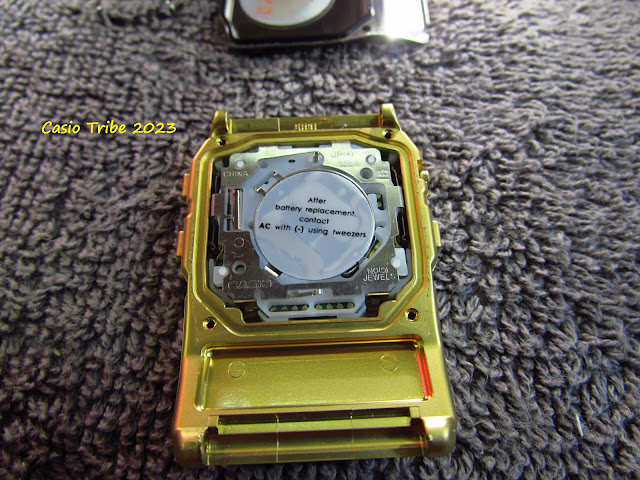
With the battery removed, it is easier to see where I inserted the sewing needle to release the battery retainer. More importantly, I can report that the old battery had not leaked, it was simply nearing the end of it's working life. The picture above shows no evidence of battery leakage whatsoever and I am both relieved and happy.
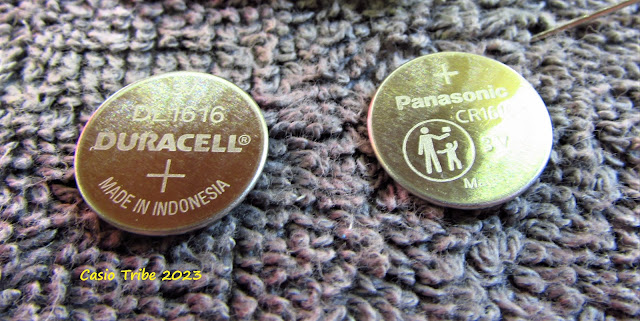
The old battery I removed was also another good example of a battery. It is the Panasonic version of the same battery and another great choice of manufacturer. The battery on the left is the replacement Duracell CR1616, again which has a great reputation.
You can see in the picture above, I have the new battery in position and ready to click into place with the retainer.
I than replaced the sticker/insulator where it was originally positioned and ignored the instruction printed upon it as it makes no sense, as the negative is under the battery and cannot be accessed. As I said, I ignored it!
With the battery and the insulator installed, I checked the "O" ring or gasket was in the correct position before offering it up to the main watch. The gasket is very important and keeps out any contaminants of foreign objects that would ruin the watch over a period of time.
I carefully replaced the rear cover, ensuring the gasket was in the correct position and refitted the four retaining screws holding it in position.
After securing the rear cover, I turned the watch over and I was happy to see the display was again clear and crisp. Happy days indeed.
I then went on to set the time on the watch and found all the buttons working perfectly as well as the alarms, chimes and bleeps! I will now dispose of the old battery in the correct manner. Remember to keep these batteries away from all children, as they are extremely poisonous.
With the strap replaced, I could now look at the difference. Wow, the display is super defined and very clear to my eyes.
I can now see the display clearly from many directions, whereas before I had to adjust my viewing angle of the watch. No need for that now. Cool beans!!
I would now imagine that the new battery should last 18 months to 2 years going on previous experiences. I happy it's done for a while as least and ready to use when I want it.
That is it for this post Guy's and I hope you have maybe enjoyed, learned and maybe use what I have covered today.
Please join me soon for further Casio watch projects.
Until then, take care fellow Casio lovers and enthusiasts from around the World.
Casio Tribe 2023
casiotribe.com
2023


Comments
Post a Comment