Casio G-Shock GWM-5600-1AER Battery/Capacitor Change (Module 3063)
Casio G-Shock GWM-5600-1AER Battery/Capacitor Change (Module 3063)
19/4/2023
As the title suggests, I will be replacing the battery on my almost 15 year old Casio G-Shock GWM-5600. I have owned the watch from new and it was a present from my wife for my 40th Birthday. I believe this watch was replaced with the 6 Band GWM-5610 some time ago making this watch model somewhat collectable, as are many other Casio models.
Although the watch has no real value, it has a lot of sentimental value to myself and I have loved this watch from day one. However, over the last couple of weeks I have noticed that the battery level indicator was on the medium level for the first time in almost 15 years. After that I put the watch in front of my DIY infra red and ultra violet light for a couple of hours with no change. I then put it in direct sunlight for a full afternoon, but again no change to the battery indicator. I then did some research and apparently, the battery needs to be changed every 10 years. I immediately panicked and ordered a new battery. A leaking battery will destroy a watch from the inside out and that is not what I want for this watch.
I bought an OEM battery for the watch as specified in the instructions. It is a Panasonic rechargeable cell classed as a CTL1616 type. The battery cost me £11.99 including delivery, which I think was cost effective and I am happy with that price and the service I received. The company I bought from were super friendly and ultra fast delivery of which I was stunned by! They are:-
As you can see from the above picture, there is a certain procedure when handling the new battery (cell). The new battery is also in the picture and is classed as a CTL1616F, which is slightly different to the original battery. However, I know that this is a genuine and correct replacement battery for this watch. I am more than happy to proceed with the battery exchange.
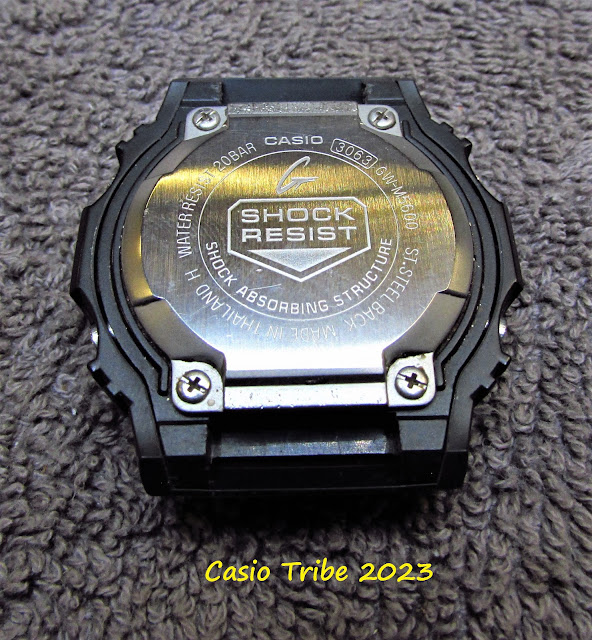
As you can see, the strap of the watch is in the way of removing the rear cover and must be removed to gain access to the internals and the old battery. The strap is held in place by spring bars.
At the rear of the watch, there are four screws securing the back case to the watch that need to be removed.
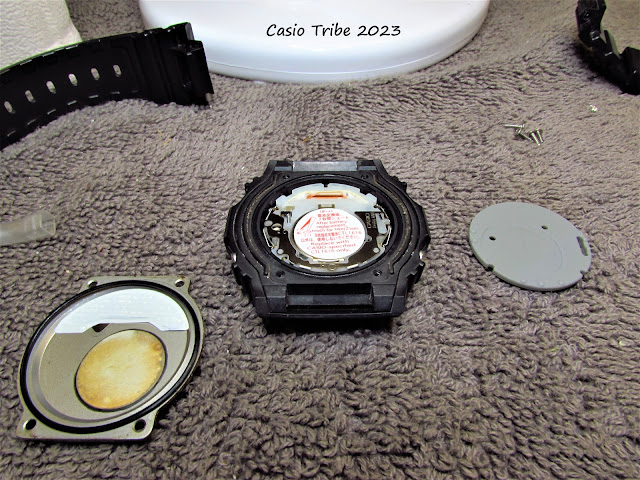
With the four screws removed, I carefully lifted off the rear case. I can now see a grey foam insulator covering the back of the watch.
Using a pair of tweezers, I carefully removed the grey covering and placed it to one side. There is a warning sticker covering the battery that also needs to be removed.
Once the sticker had carefully been removed, I used a sewing needle to release (lightly push) the battery clip and release the battery.
The battery (cell) on the left is the replacement, and the right battery is the old cell that is being replaced. Notice the new battery has the "F" stamped on it. I have no idea what the stands for to be honest, do you? Anyways, let me install the new battery!
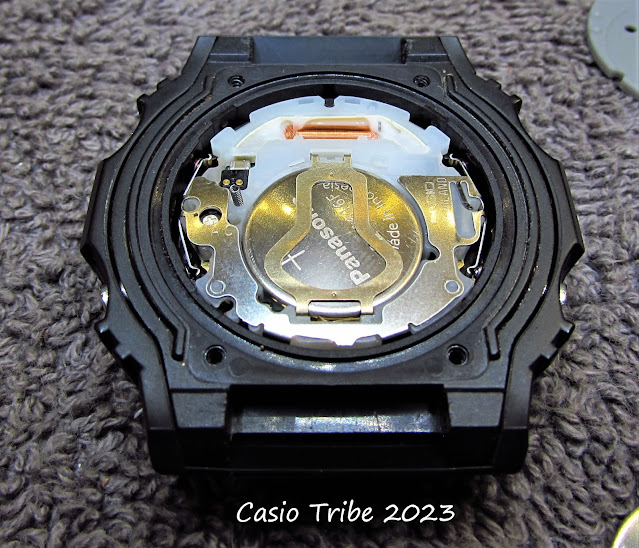
Using a pair of plastic tweezers (as advised from the battery instructions), I carefully inserted the new battery (cell) into the watch and simply pushed the battery retainer into place until it clicked. The finished install as you can see from the picture above.
Once the warning sticker was reinstated, I replaced the rear grey cover and ensured the spring was protruding from the grey cover (green arrow). I also ensured that the rubber seal was also located correctly.
After turning the watch over, I was pleased to see the CHG (charge) indicator flashing and indeed reporting a successful charge was taking place. I did have to set the time, date etc manually on start up. Notice there are no battery condition indicator's displayed until the battery is charged!
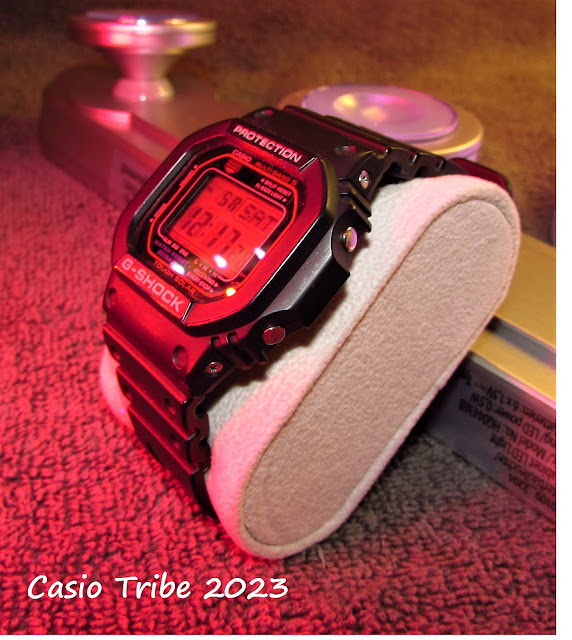
After carefully refitting the strap and manually setting the time, I popped the watch in front of my DIY ultra violet and infra red light.
After an hour under my DIY light, the watch was fully charged and had set it's own time. Each LCD segment is now super clear and my watch has another ten years of life at least for only £11.99.
With that last sentence I wrote been took into account, I bet taking this watch to a main dealer would cost at least £35. That is, even if they would touch it.
Well my fellow Casio watch enthusiasts, that is the end of this post. I hope you enjoyed it, maybe learned a little and saved some money.
Until my next post, take care and stay safe!
19/4/2023
Casio Tribe 2023









Comments
Post a Comment